
Noising process on digit 2 with sigma = [0, 0.2, 0.4, 0.6, 0.8, 1.0]
In this project, we train our own diffusion models from scratch on MNIST digits. We start with a simple UNet denoiser, then add time conditioning, and finally class conditioning to generate specific digits.
In this section we explore how to use a UNet to denoise MNIST images instead of general images from the diffusion model. We first show how noise is added by visualizing the digit 2 at different noise levels:
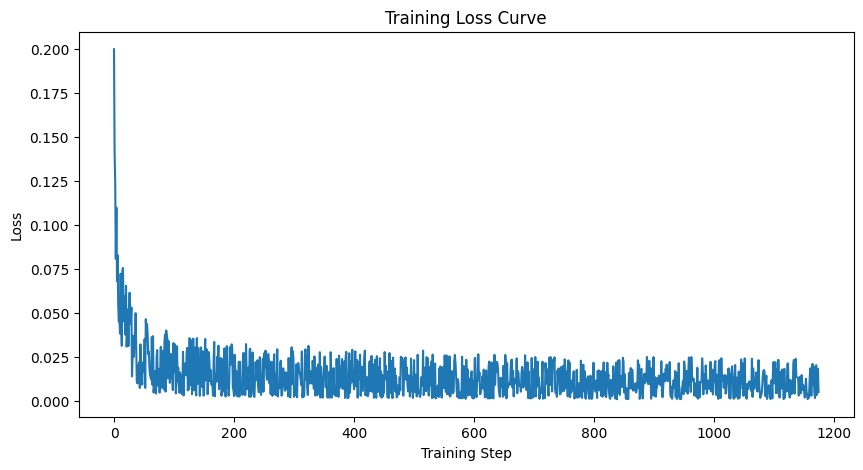
We trained the UNet on MNIST with sigma = 0.5. The training loss curve is as follows:
As a comparison of how the UNet performs at different points during training, we show the results after the 1st and 5th epochs on a few examples:
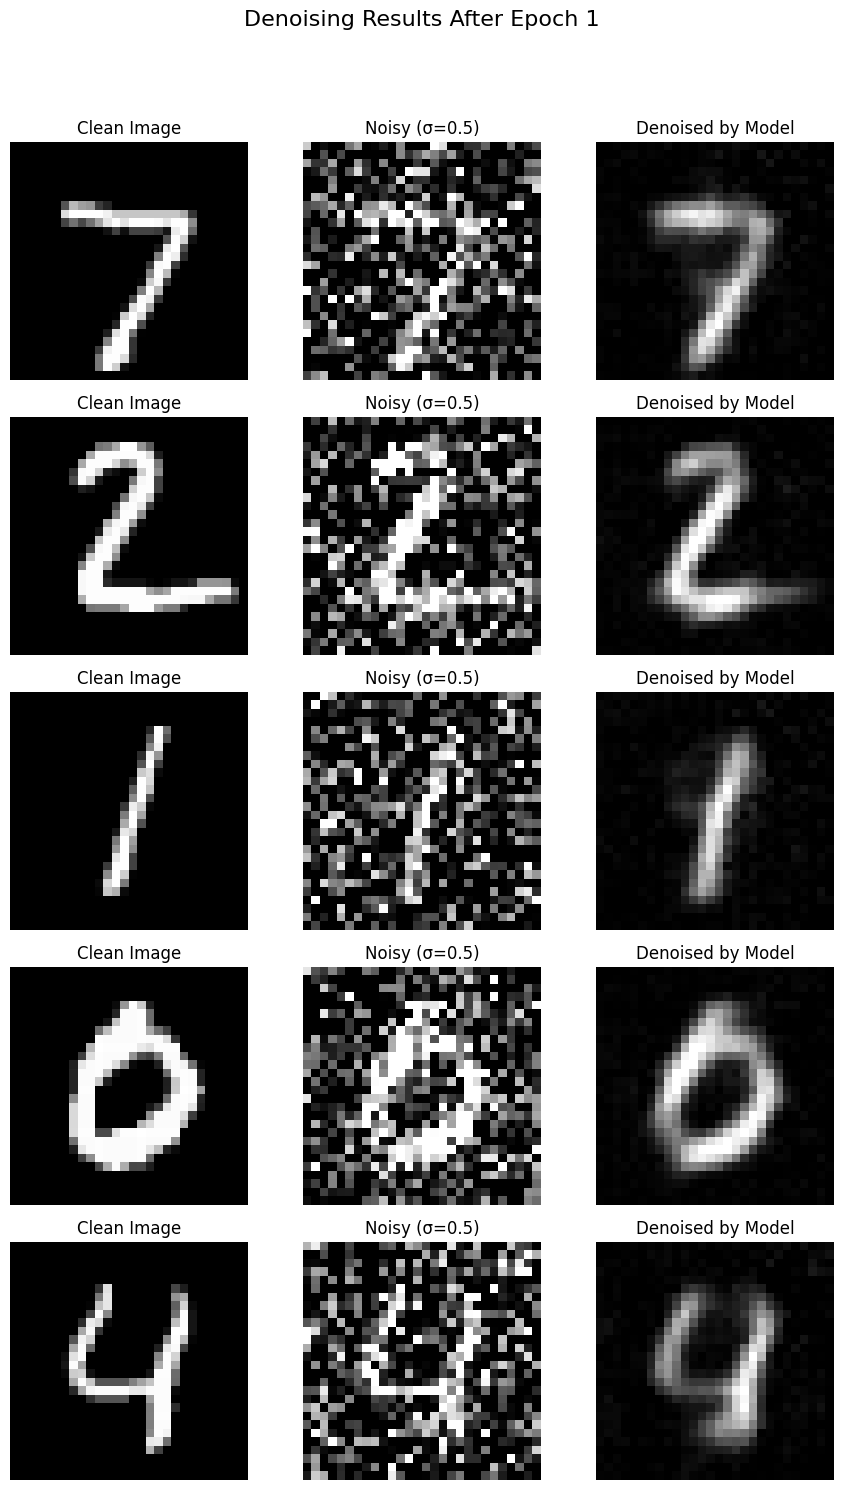
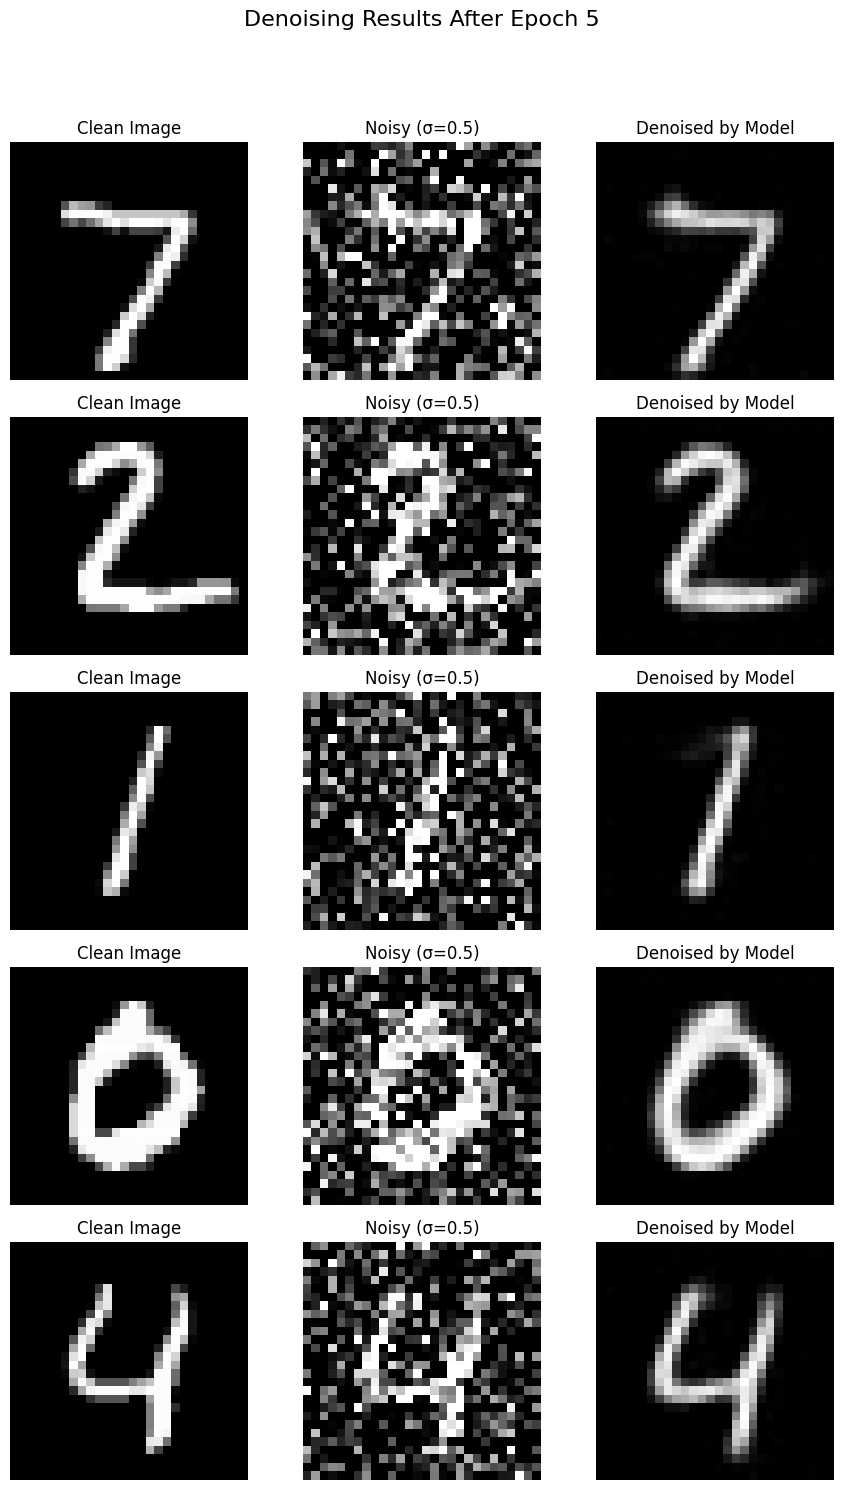
We can see that the UNet performs better after the 5th epoch than the first epoch. This is because the UNet is not able to denoise the image as well after the 1st epoch and still has some extra white traces.
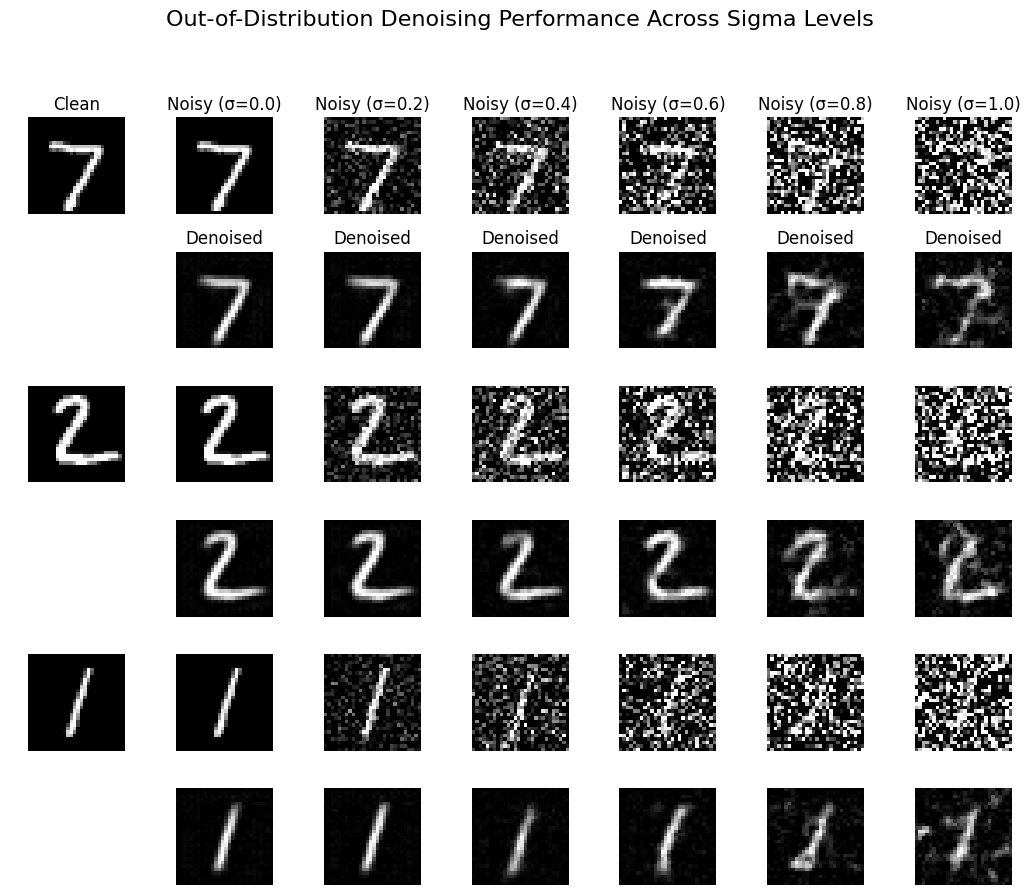
We also tried to denoise images out of distribution by testing various values of sigma from 0 to 1. The results for 3 examples are as follows:
We can see that the UNet has a higher loss but the training loss seems to be relatively stable.
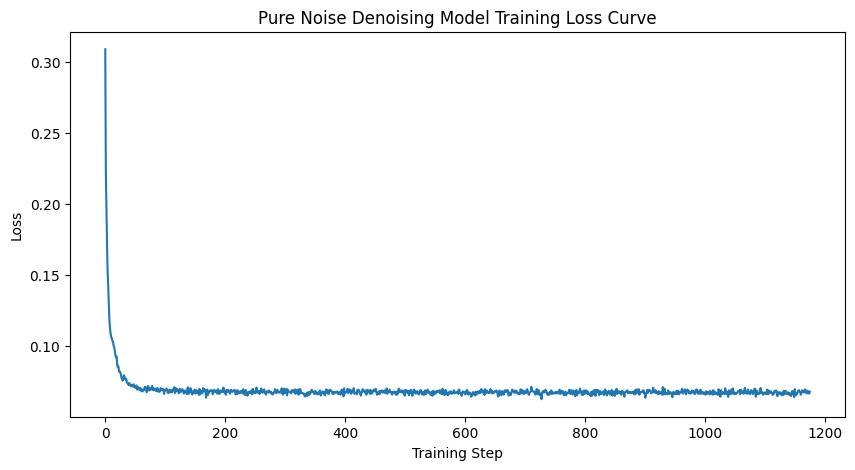
We tried to denoise pure noise by training the UNet on pure noise. The training loss curve is as follows:
The results for pure noise after the 1st and 5th epochs are as follows:
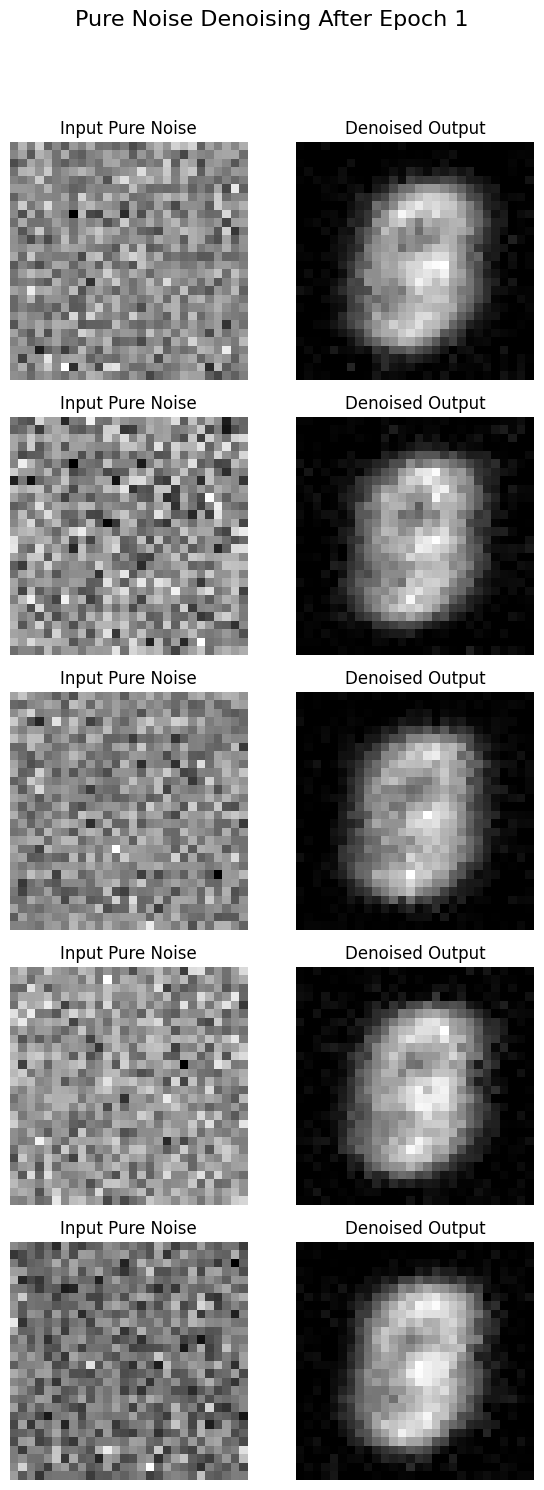
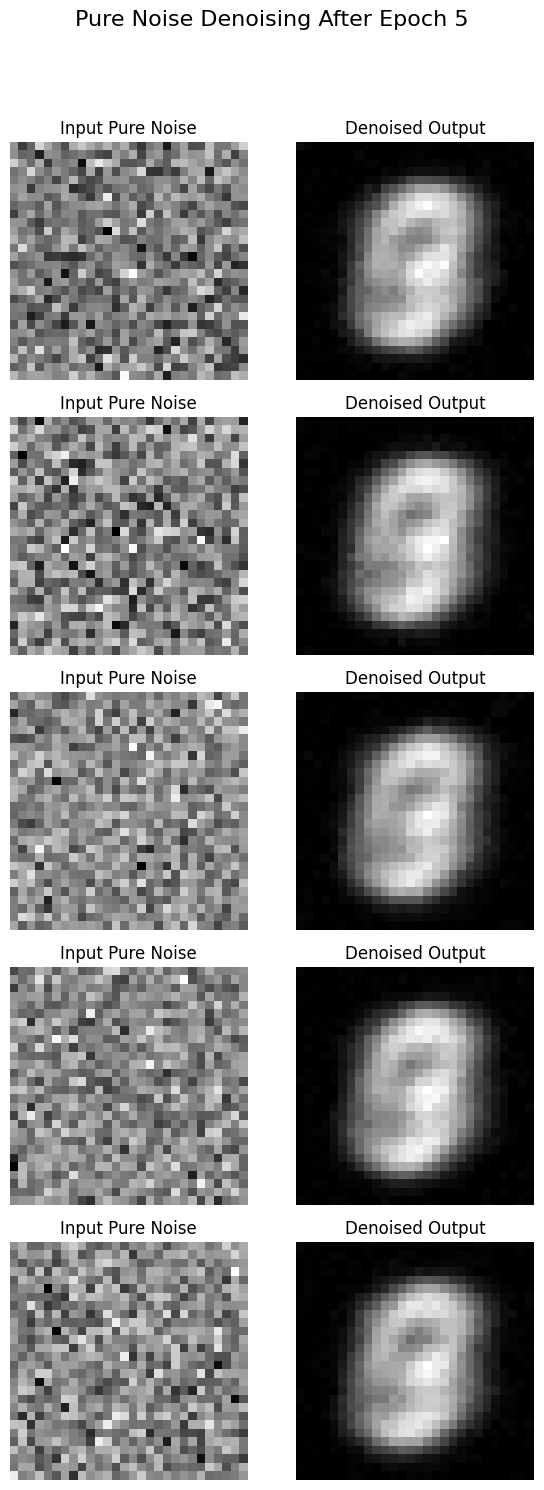
We see that epoch 5 is a bit less blurry but all of the outputs look the same for a given epoch. I think that because the input does not provide any information at all, the UNet learned to just not use the input and output a constant image that is the closest to the average of the training data (it looks like all of the digits where it is more light when there are more digits going through it).
We first show the training loss curve for the time-conditioned UNet:
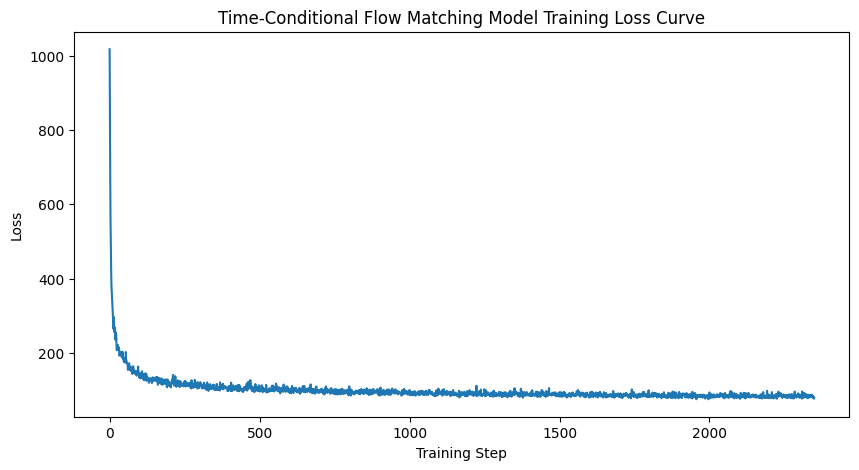
We trained a time-conditioned UNet to help provide extra context for the denoising process. By having this extra time parameter, it gives the UNet more information about how much noise there is and thus helps it decode. Here are the results after training for 1, 5, and 10 epochs:

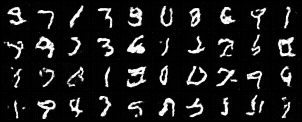
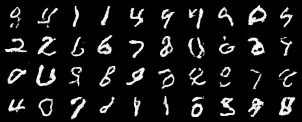
We can see that the time-conditioned UNet struggles to generate digits even after 10 epochs where it has stabilized in training loss. I think this may be due to not knowing which digit to generate since the UNet will likely just generate a "random" looking digit. Note that it is better than the pure noise model as the time parameter provides some context and so it looks less noisy.
We now give the model even more context: we tell the UNet the class of the image (what digit it is) and see how it affects performance as well as sampling. If this works, it would let us generate chosen digits from the UNet instead of random digits.
We first show the training loss curve for the class-conditioned UNet:
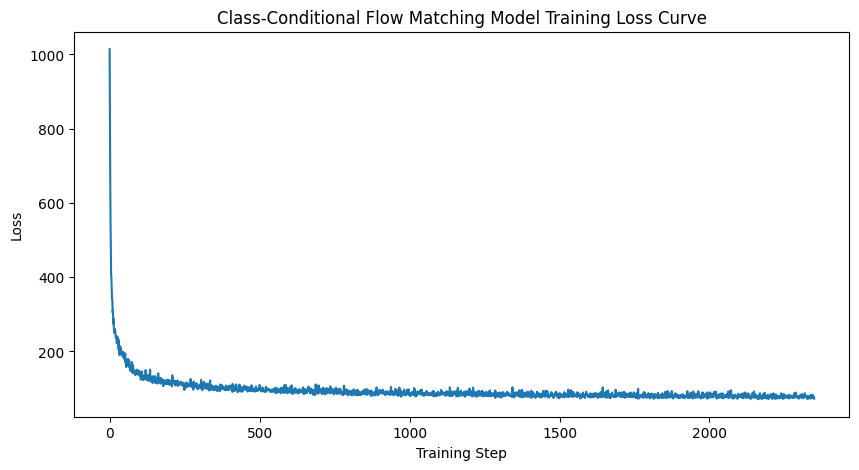
We can see that the loss decreases over time, indicating that it does better on the training data.
We show the sampling results for the class-conditioned UNet, generating 4 instances of each digit:
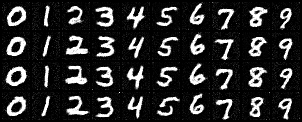
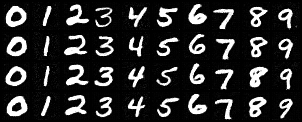
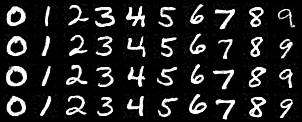
We can see that the class-conditioned UNet is able to generate the digits much earlier into the training than the time-conditioned UNet. It seems that this extra piece of information is enough to help the UNet converge faster.